# 02. 测试用户交互
本节我们将实现:在 https://www.baidu.com 中输入 matman 搜索,并且验证搜索结果。
最终的代码参考: https://github.com/matmanjs/matman-demo-getting-started/tree/master/baidu_02
# 1. 编写端对端测试模块
# 1.1 测试场景
对于测试"用户交互"的场景,我们的基础理论为:
- 测试方案:通过对比动作前后的两个快照变化,如果变化是符合预期的,则说明该次动作的端对端测试通过
- 处理策略:但由于 页面快照 是抽象的,无法进行比对,因此,我们做 web 端对端测试的时候,通过数据快照爬虫脚本将其转为 数据快照 。
就本 demo 而言,一共将发生三个动作,依次是:
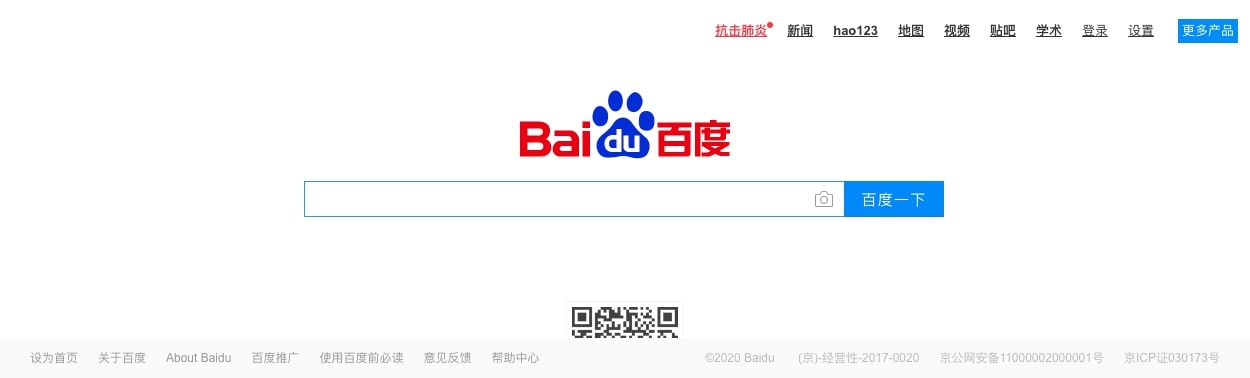
- 加载 https://www.baidu.com 页面
- 在搜索框内输入
matman - 点击搜索按钮
每一个动作都会带来一定的变化,我们将其称之为一个新的 页面快照。为了区分不同阶段的快照,我们可以为快照命名:
- 加载页面之后,产生的快照命名为
init - 在输入框内输入
matman之后,产生的快照命名为input_key_word - 点击搜索按钮之后,产生的快照命名为
click_to_search

# 1.2 编写数据快照爬虫脚本
编写爬虫脚本的过程,就是梳理业务的过程。爬取什么样的内容完全依据你的业务逻辑。
新增 case_modules/page_baidu_index/crawlers/get-page-info-for-search.js 文件。
每一次动作之后产生的信息是非常多的,大部分情况下我们不需要全部爬取出来,我们只需要选择我们关注的点即可,一般与要测试的目的有关系。
例如,本次测试过程,选取了三个部分来验证功能。接下来我们简单介绍下为何这么选择:
# 1.2.1 页面 title
在搜索之前页面 title 值为 百度一下,你就知道,而搜索之后,title 会变为 <搜索词>_百度搜索 这样的模式,我们通过如下的代码获取 title:
const title = document.title;
# 1.2.2 搜索框的信息
例如:在页面加载完成时,搜索输入框内容为空,输入关键词然后点击搜索按钮之后,输入框内都会保留这个搜索关键词,我们通过如下的代码获取搜索关键词:
/**
 * 获取搜索框相关的信息
 */
function getSearchInputInfo() {
  return {
    keyWorld: jQuery('#kw').val(),
    searchBtnText: jQuery('#su').val(),
  };
}
# 1.2.3 搜索结果信息
显然这个不用解释,搜索之前一定没有搜索结果,在点击搜索按钮之后,预期能够获得搜索结果。
/**
 * 获取搜索结果相关的信息
 */
function getSearchResultInfo() {
  const jqContainer = jQuery('#content_left');
  const result = {
    isExist: !!jqContainer.length,
    list: [],
  };

  function getItemData(jqItem) {
    return {
      title: jQuery('.t', jqItem).text().trim(),
      describe: jQuery('.c-abstract', jqItem).text().trim(),
      tpl: jqItem.attr('tpl'),
    };
  }

  jQuery('.c-container', jqContainer).each(function () {
    result.list.push(getItemData(jQuery(this)));
  });

  return result;
}
# 1.2.4 测试验证
最终完成的快照爬虫如下:
/**
 * 获取搜索框相关的信息
 */
function getSearchInputInfo() {
  return {
    keyWorld: jQuery('#kw').val(),
    searchBtnText: jQuery('#su').val(),
  };
}

/**
 * 获取搜索结果相关的信息
 */
function getSearchResultInfo() {
  const jqContainer = jQuery('#content_left');
  const result = {
    isExist: !!jqContainer.length,
    list: [],
  };

  function getItemData(jqItem) {
    return {
      title: jQuery('.t', jqItem).text().trim(),
      describe: jQuery('.c-abstract', jqItem).text().trim(),
      tpl: jqItem.attr('tpl'),
    };
  }

  jQuery('.c-container', jqContainer).each(function () {
    result.list.push(getItemData(jQuery(this)));
  });

  return result;
}

module.exports = () => {
  return {
    title: document.title,
    cookie: document.cookie,
    searchInputInfo: getSearchInputInfo(),
    searchResultInfo: getSearchResultInfo(),
  };
};
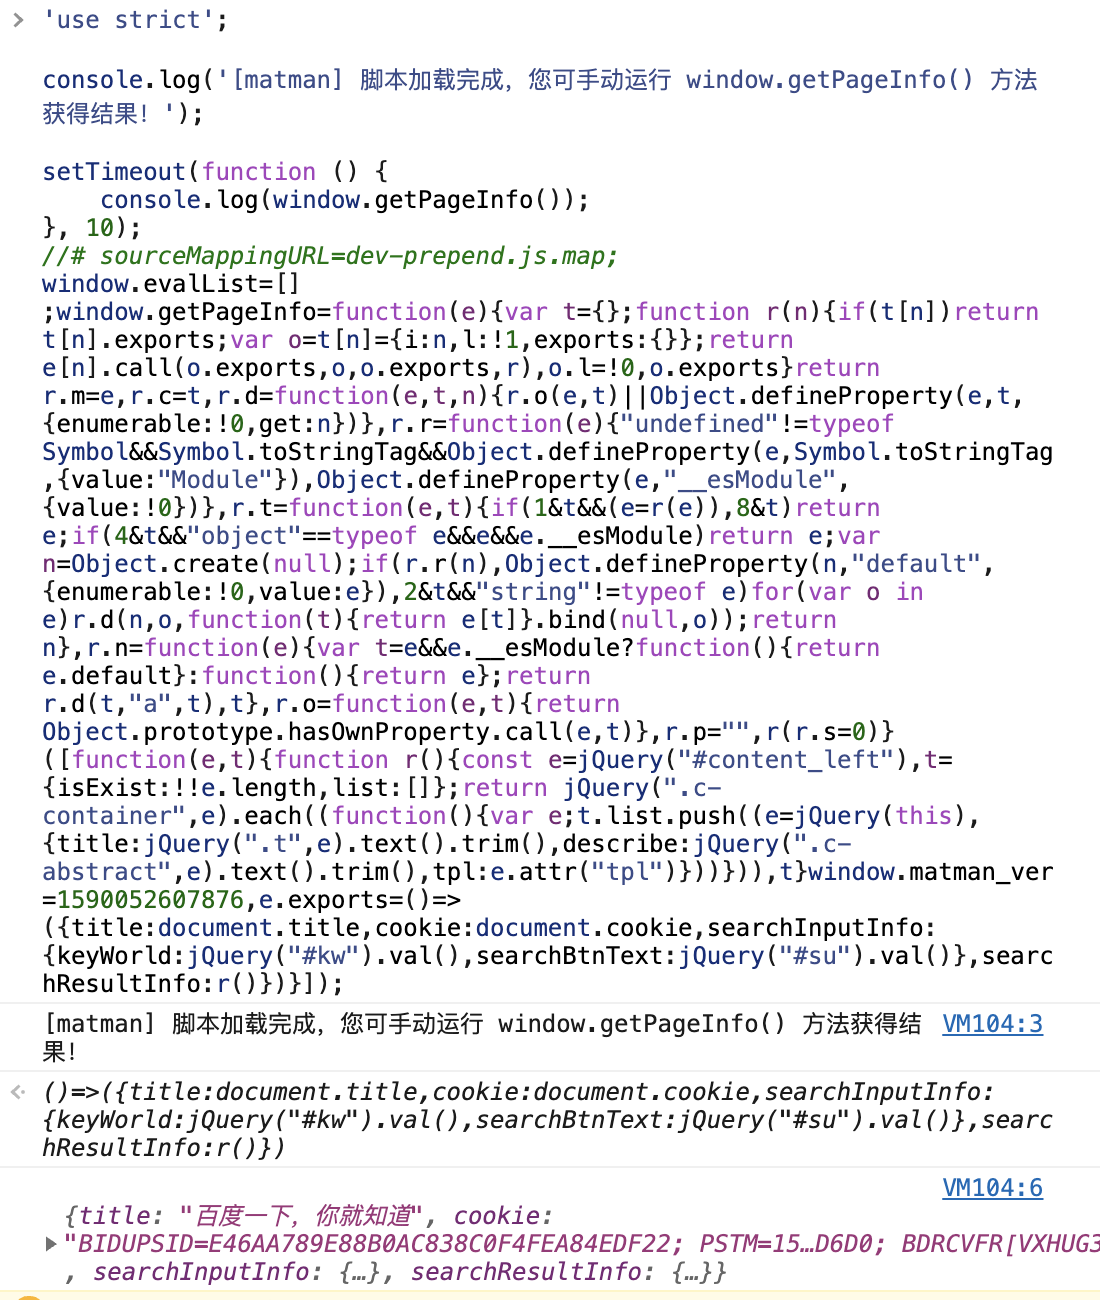
# 1.2.5 浏览器测试
编写完成之后,我们可以在浏览器内进行验证,执行爬虫脚本的打包命令:
$ npm run build-dev
- 上述命令会生成一个调试脚本
build/crawler-script_dev/page_baidu_index/crawlers/get-page-info-for-search.js - 拷贝所有的内容在浏览器
console控制台,然后查看输出即可
输出结果如下:
# 1.2 编写测试案例模块
在 case_modules/page_baidu_index/search-check.js 文件中,有如下内容:
const path = require('path');
const matman = require('matman');
const {BrowserRunner} = require('matman-runner-puppeteer');

module.exports = async opts => {
  const page = matman.launch(new BrowserRunner(), opts);
  // 设置浏览器参数
  await page.setDeviceConfig({
    userAgent:
      'Mozilla/5.0 (Windows NT 10.0; Win64; x64) AppleWebKit/537.36 (KHTML, like Gecko) Chrome/62.0.3202.75 Safari/537.36 mycustomua',
    viewport: {
      width: 1250,
      height: 400,
    },
  });

  // 设置 cookie
  await page.setCookieConfig('mykey1=myvalue1; mykey2=myvalue2');

  // 设置截屏
  await page.setScreenshotConfig(true);

  // 加载页面地址
  await page.setPageUrl('https://www.baidu.com');

  // 第一步:开始操作之前
  await page.addAction('init', async function (page) {
    // nightmare 支持所有的原始 nightmare 语法和对其定制的扩展功能
    await page.waitFor('#su');
  });

  // 第二步:搜索输入框输入: matman
  await page.addAction('input_key_word', async function (page) {
    // nightmare 支持所有的原始 nightmare 语法和对其定制的扩展功能
    await page.type('#kw', 'matman');
    await page.waitFor(500);
  });

  // 第三步:点击搜索按钮,获得搜索结果
  await page.addAction('click_to_search', async function (page) {
    // nightmare 支持所有的原始 nightmare 语法和对其定制的扩展功能
    await page.click('#su');
    await page.waitFor('#content_left');
  });

  // 执行爬虫脚本文件或者爬虫脚本函数
  const res = await page.evaluate(
    path.resolve(__dirname, './crawlers/get-page-info-for-search.js'),
  );

  return res;
};
文件的具体流程可以参考
# 2. 编写测试用例脚本
新增 test/search-check.test.js 文件,并加入下面内容:
const {expect} = require('chai');
const checkPage = require('../case_modules/page_baidu_index/search-check.matman');
describe('百度首页:搜索', function () {
this.timeout(30000);
let resultData;
before(function () {
return checkPage({
show: process.env.SHOW_BROWSER || false,
doNotCloseBrowser: false,
useRecorder: true,
}).then(function (result) {
// console.log(JSON.stringify(result));
resultData = result;
});
});
describe('第一步:开始操作之前', function () {
let data;
before(function () {
data = resultData.get('init');
});
it('title 应该为: 百度一下,你就知道', function () {
expect(data.title).to.equal('百度一下,你就知道');
});
it('cookie: 应该包含 mykey1=myvalue1; mykey2=myvalue2', function () {
expect(data.cookie).to.match(new RegExp('mykey1=myvalue1; mykey2=myvalue2', 'gi'));
});
it('searchInputInfo: 搜索框为空', function () {
expect(data.searchInputInfo).to.eql({
keyWorld: '',
searchBtnText: '百度一下',
});
});
it('searchResultInfo: 没有搜索结果', function () {
expect(data.searchResultInfo).to.eql({isExist: false, list: []});
});
});
describe('第二步:搜索输入框输入: matman', function () {
let data;
before(function () {
data = resultData.get('input_key_word');
});
it('title 应该为: 百度一下,你就知道', function () {
expect(data.title).to.equal('百度一下,你就知道');
});
it('searchInputInfo: 搜索框内值为 matman', function () {
expect(data.searchInputInfo).to.eql({
keyWorld: 'matman',
searchBtnText: '百度一下',
});
});
it('searchResultInfo: 没有搜索结果', function () {
expect(data.searchResultInfo).to.eql({isExist: false, list: []});
});
});
describe('第三步:点击搜索按钮,获得搜索结果', function () {
let data;
before(function () {
data = resultData.get('click_to_search');
});
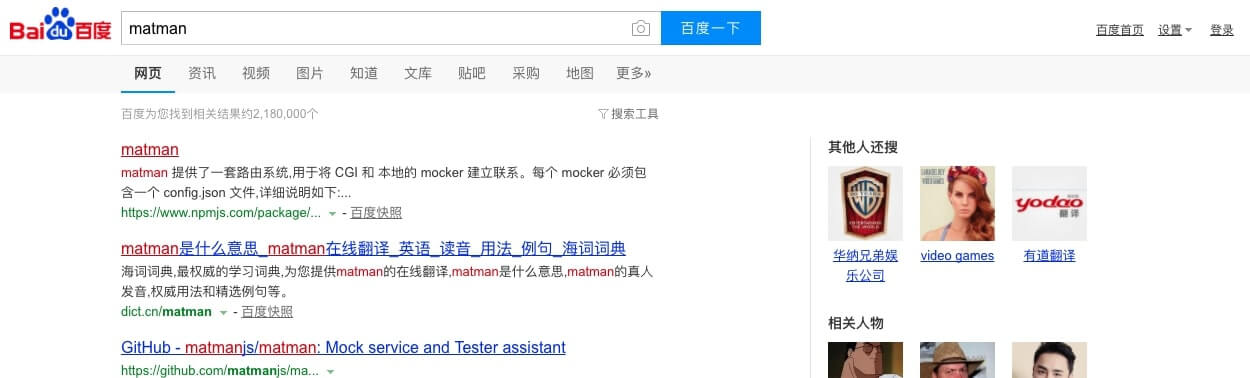
it('title 应该为: matman_百度搜索', function () {
expect(data.title).to.equal('matman_百度搜索');
});
it('searchInputInfo: 搜索框内值为 matman', function () {
expect(data.searchInputInfo).to.eql({
keyWorld: 'matman',
searchBtnText: '百度一下',
});
});
it('searchResultInfo: 存在搜索结果', function () {
expect(data.searchResultInfo.isExist).to.be.true;
});
it('searchResultInfo: 搜索之后展示了 10 个结果', function () {
expect(data.searchResultInfo.list).to.have.lengthOf(10);
});
});
});
- 需要补充的是,此步骤是为了对比数据快照之间的
区别,因此,每一个步骤执行之后验证的重点是不一样的,依据业务自身特点,至少要涵盖关键变化。 - 例如第二步输入搜索词之后,需要关注输入框内是否真存在搜索词,而第三步点击搜索按钮之后,则重点看搜索结果是否存在,同时页面 title 也发生了变化。
# 3. 执行端对端测试
运行如下命令,执行端对端测试:
$ npm test
# 3.1 测试结果

# 3.2 测试截图
同时,由于我们配置了测试过程截图,因此可以在 build/screenshot/page_baidu_index_cases 目录下看到截图:
- 第一步:加载页面
- 第二步:在输入框内输入
matman

- 第三步:点击搜索按钮
← 01. 第一个端对端测试 03. 更多例子 →