# 01. 第一个端对端测试
本节我们将实现:测试 https://www.baidu.com 首页的UI布局。
最终的代码参考: https://github.com/matmanjs/matman-demo-getting-started/tree/master/baidu_01
# 1. 编写端对端测试
# 1.1 编写数据快照爬虫脚本
编写数据快照爬虫,内容如下(需要注意的是在本项目中 未出现此函数,而是直接写在了 matman 流程中):
const spider = () => {
  return {
    title: document.title,
    width: window.innerWidth,
    height: window.innerHeight,
    userAgent: navigator.userAgent,
    _version: Date.now(),
    searchBtnTxt: document.querySelector("#su").value,
  };
}
# 1.2 编写无头浏览器操作
在 case_modules/page_baidu_index/basic-check.matman.js 文件中,有如下内容:
const matman = require('matman');
const {BrowserRunner} = require('matman-runner-puppeteer');

module.exports = async opts => {
  // 初始化 pageDriver
  const page = matman.launch(new BrowserRunner(), opts);

  // 设置浏览器参数
  await page.setDeviceConfig({
    userAgent:
      'Mozilla/5.0 (Windows NT 10.0; Win64; x64) AppleWebKit/537.36 (KHTML, like Gecko) Chrome/62.0.3202.75 Safari/537.36 mycustomua',
    viewport: {
      width: 1250,
      height: 400,
    },
  });

  // 设置截屏
  await page.setScreenshotConfig(true);

  // 设置 URL
  await page.setPageUrl('https://www.baidu.com');

  // 设置 action
  await page.addAction('init', async page => {
    await page.waitFor('#su');
  });

  // 执行返回结果
  const res = await page.evaluate(() => {
    return {
      title: document.title,
      width: window.innerWidth,
      height: window.innerHeight,
      userAgent: navigator.userAgent,
      _version: Date.now(),
      searchBtnTxt: document.querySelector('#su').value,
    };
  });
  return res;
};
# 1.2.1 流程概览
这里我们只介绍脚本执行的大致流程,具体的 API 可以参考
- launch:创建 Browser 对象,使用它对浏览器进行设置
- 第一个参数为执行
Runner,我们目前支持 puppeteer 与Nightmare 两种,推荐使用 puppeteer - 第二个参数为配置选项,可以从传入对应的选项,可以参考
- 第一个参数为执行
- setDeviceConfig:设置浏览器参数
- setScreenshotConfig:设置截屏(页面截图保存在
/build/screenshot_output中) - setPageUrl:设置页面地址
- addAction:无头浏览器支持的行为,在这里推荐所有的第一个行为是形如上方代码中的 init 以抓取初始的数据快照
- evaluate:用于执行 action 并获取页面中的数据:
- 接受的参数为函数或者爬虫脚本
绝对路径 - 返回的结果为 matmanResult,请参考
- 接受的参数为函数或者爬虫脚本
# 1.2.2 自测
module
  .exports()
  .then(function (result) {
    console.log(JSON.stringify(result));
  })
  .catch(function (error) {
    console.error("failed:", error);
  });
编写完成后,如果要自测,可以在文件末尾加入如上代码,然后用 node 执行本文件。
# 2. 编写测试用例
# 2.1 测试过程分离
一般情况下我们推荐将 matman 的测试过程与测试样例进行分离,便于维护
在 test/basic-check.test.js 文件中,对数据快照进行检验,内容如下:
const {expect} = require('chai');

const checkPage = require('../case_modules/page_baidu_index/basic-check.matman');

describe('百度首页:常规检查', function () {
  this.timeout(30000);

  let resultData;

  before(function () {
    return checkPage({
      show: process.env.SHOW_BROWSER || false,
      doNotCloseBrowser: false,
      useRecorder: true,
    }).then(function (matmanResult) {
      // console.log(JSON.stringify(result));
      resultData = matmanResult;
    });
  });

  describe('检查基本信息', function () {
    let data;

    before(function () {
      data = resultData.get('init');
    });

    it('网站title应该为:百度一下,你就知道', function () {
      expect(data.title).to.equal('百度一下,你就知道');
    });

    it('搜索按钮的文字应该为:百度一下', function () {
      expect(data.searchBtnTxt).to.equal('百度一下');
    });

    it('userAgent应该正确', function () {
      expect(data.userAgent).to.equal(
        'Mozilla/5.0 (Windows NT 10.0; Win64; x64) AppleWebKit/537.36 (KHTML, like Gecko) Chrome/62.0.3202.75 Safari/537.36 mycustomua',
      );
    });
  });
});
# 2.2 单文件测试
在 test/basic-check-in-single-file.test.js 文件中,同时执行 matman 操作过程与数据快照检验,内容如下:
const path = require('path');
const { expect } = require('chai');
const matman = require('matman');
const { BrowserRunner } = require('matman-runner-puppeteer');

describe('百度首页:常规检查(单文件)', function () {
  this.timeout(30000);

  let resultData;

  before(async function () {
    const MATMAN_ROOT_PATH = path.join(__dirname, '../');

    // 创建 PageDriver 对象,使用它可以实现对浏览器页面的控制
    const pageDriver = matman.launch(new BrowserRunner(), {
      rootPath: MATMAN_ROOT_PATH,
    });

    // 设置浏览器参数
    await pageDriver.setDeviceConfig({
      userAgent:
        'Mozilla/5.0 (Windows NT 10.0; Win64; x64) AppleWebKit/537.36 (KHTML, like Gecko) Chrome/62.0.3202.75 Safari/537.36 mycustomua',
      viewport: {
        width: 1250,
        height: 400,
      },
    });

    // 设置截屏
    await pageDriver.setScreenshotConfig(true);

    // 加载页面地址
    await pageDriver.setPageUrl('https://www.baidu.com');

    // 需要等待某些条件达成,才开始运行爬虫脚本
    await pageDriver.addAction('SCAN_PAGE', async (page) => {
      await page.waitFor('#su');
    });

    // 结束,获取结果
    resultData = await pageDriver.evaluate(() => {
      return {
        title: document.title,
        width: window.innerWidth,
        height: window.innerHeight,
        userAgent: navigator.userAgent,
        _version: Date.now(),
        searchBtnTxt: document.querySelector('#su').value,
      };
    });
  });

  describe('检查基本信息', function () {
    let data;

    before(function () {
      data = resultData.data[0];
    });

    it('网站title应该为:百度一下,你就知道', function () {
      expect(data.title).to.equal('百度一下,你就知道');
    });

    it('搜索按钮的文字应该为:百度一下', function () {
      expect(data.searchBtnTxt).to.equal('百度一下');
    });

    it('userAgent应该正确', function () {
      expect(data.userAgent).to.equal(
        'Mozilla/5.0 (Windows NT 10.0; Win64; x64) AppleWebKit/537.36 (KHTML, like Gecko) Chrome/62.0.3202.75 Safari/537.36 mycustomua'
      );
    });
  });
});
# 3. 执行测试
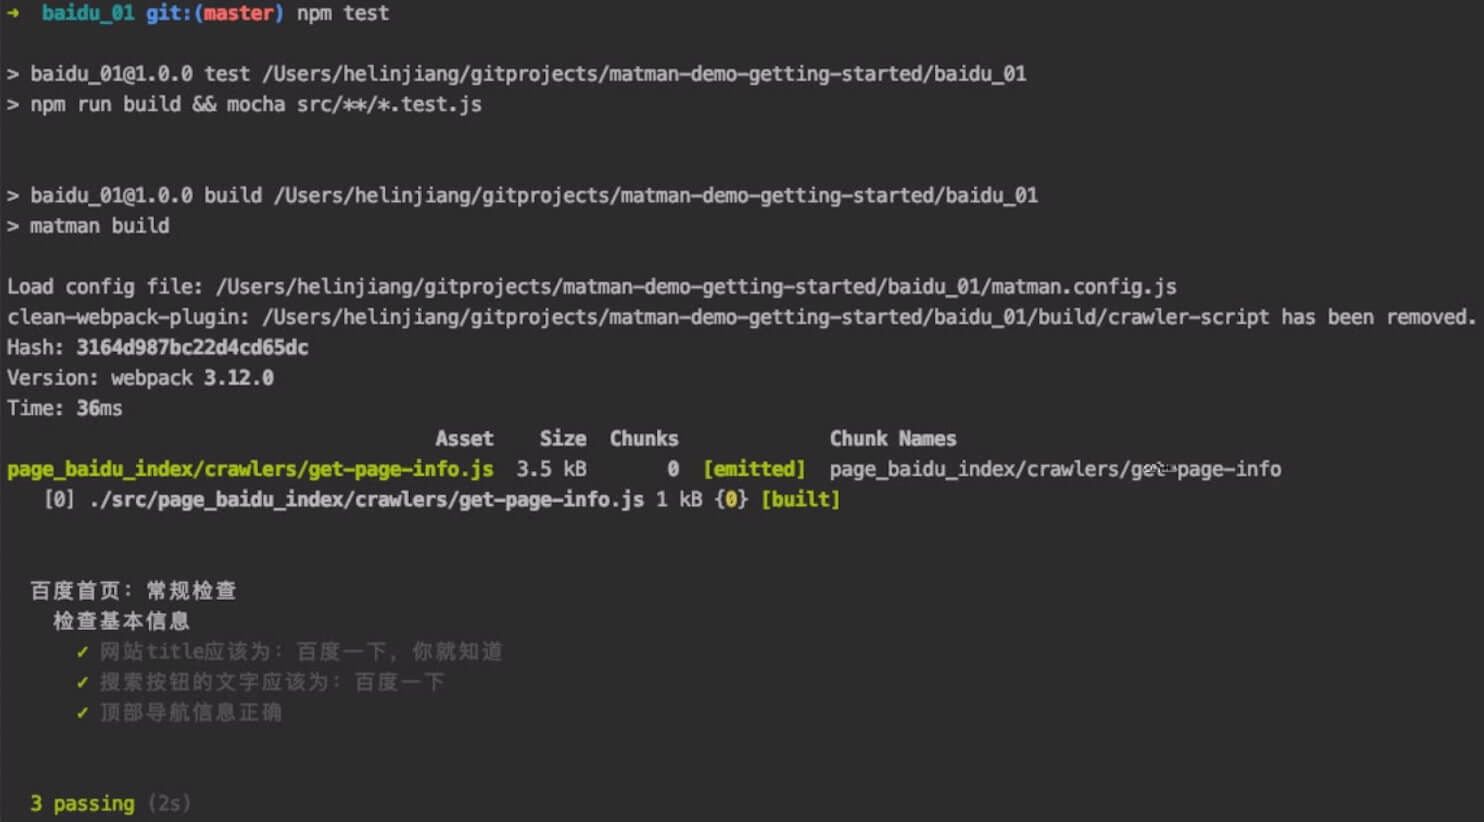
运行如下命令,执行端对端测试:
$ npm test

同时,由于我们配置了测试过程截图,因此可以在 build/screenshot/page_baidu_index_cases 目录下看到截图:

← 快速开始 02. 测试用户交互 →